Introduction
The new uniFLOW Online service brings new features to Campus printing and scanning, including:
NOTE: the option to print to the "Tiger-Print" printer will only work with those MFDs that have not been replaced. The "TigerPrint Online" option will only work with those printers that have been replaced. You can tell which MFDs have been replaced as they will have a QR Code on the MFD's panel display.
- Better support for printing via Email
- Printing a document via web page upload
- Printing from personal computers anywhere, not just on campus
- Scanning items directly to Campus OneDrive accounts and Team Sites
- Printing of items on Campus OneDrive accounts and Team Sites
- Easier printing from Mobile devices through a uniFLOW Online Mobile app
- Easier print job release at MFDs through the Mobile App
Changes with the new uniFLOW Online service
With a new service there are going to be some changes as always, but this should help ease you through some of the changes.
- Print jobs are now stored for 1 day as opposed to only 8 hours
- The printer will now be listed as TigerPrint Online, and you will select that option to print to, even for the non-mfd printers. When you select that option it will give you a pop-up to select either "Secure Print" or any other available printers in your area you can print to. For a short time you will still see both the old TigerPrint and printer options, as we deploy the printers around campus. The pop-up option will not appear unless you can select a local printer.
- In the past you had to select the Personal Cost Center when printing, now with the new options, it will only bring up the pop-up if you have the option to choose a different printer. Otherwise it will always print to the Secure TigerPrint option.
- No longer an option to go into the negative with your printing balance. In the previous version some people were able to print and print and print, with out having to worry about getting stopped by their print quota. In this new service the print quota is strictly enforced, which means when you run your quota out, it will not let you print or copy any further until ITS takes a look. More on how this will be handled coming soon.
- Cost Centers for Student workers. This is changing as well, and more will information will be provided about this soon as well.
Setting up uniFLOW Online
- Connecting to uniFLOW Online via Web Browser
- Open a web browser and navigate to https://wittenberg.us.uniflowonline.com
- Click the "Continue with Azure AD Authentication"
- Enter in your campus email address and password when prompted
- You will then be taken to the uniFLOW Online Dashboard
- Setting up the uniFLOW Online Mobile App
1. In the app store / play store search for "uniFLOW Online Print & Scan" NOTE: the developer will be listed as "NT-Ware" or "NT-ware Systemprogrammierung GmbH"
2. Download and install the app

3. On the "Welcome to uniFLOW Online" click the Next button 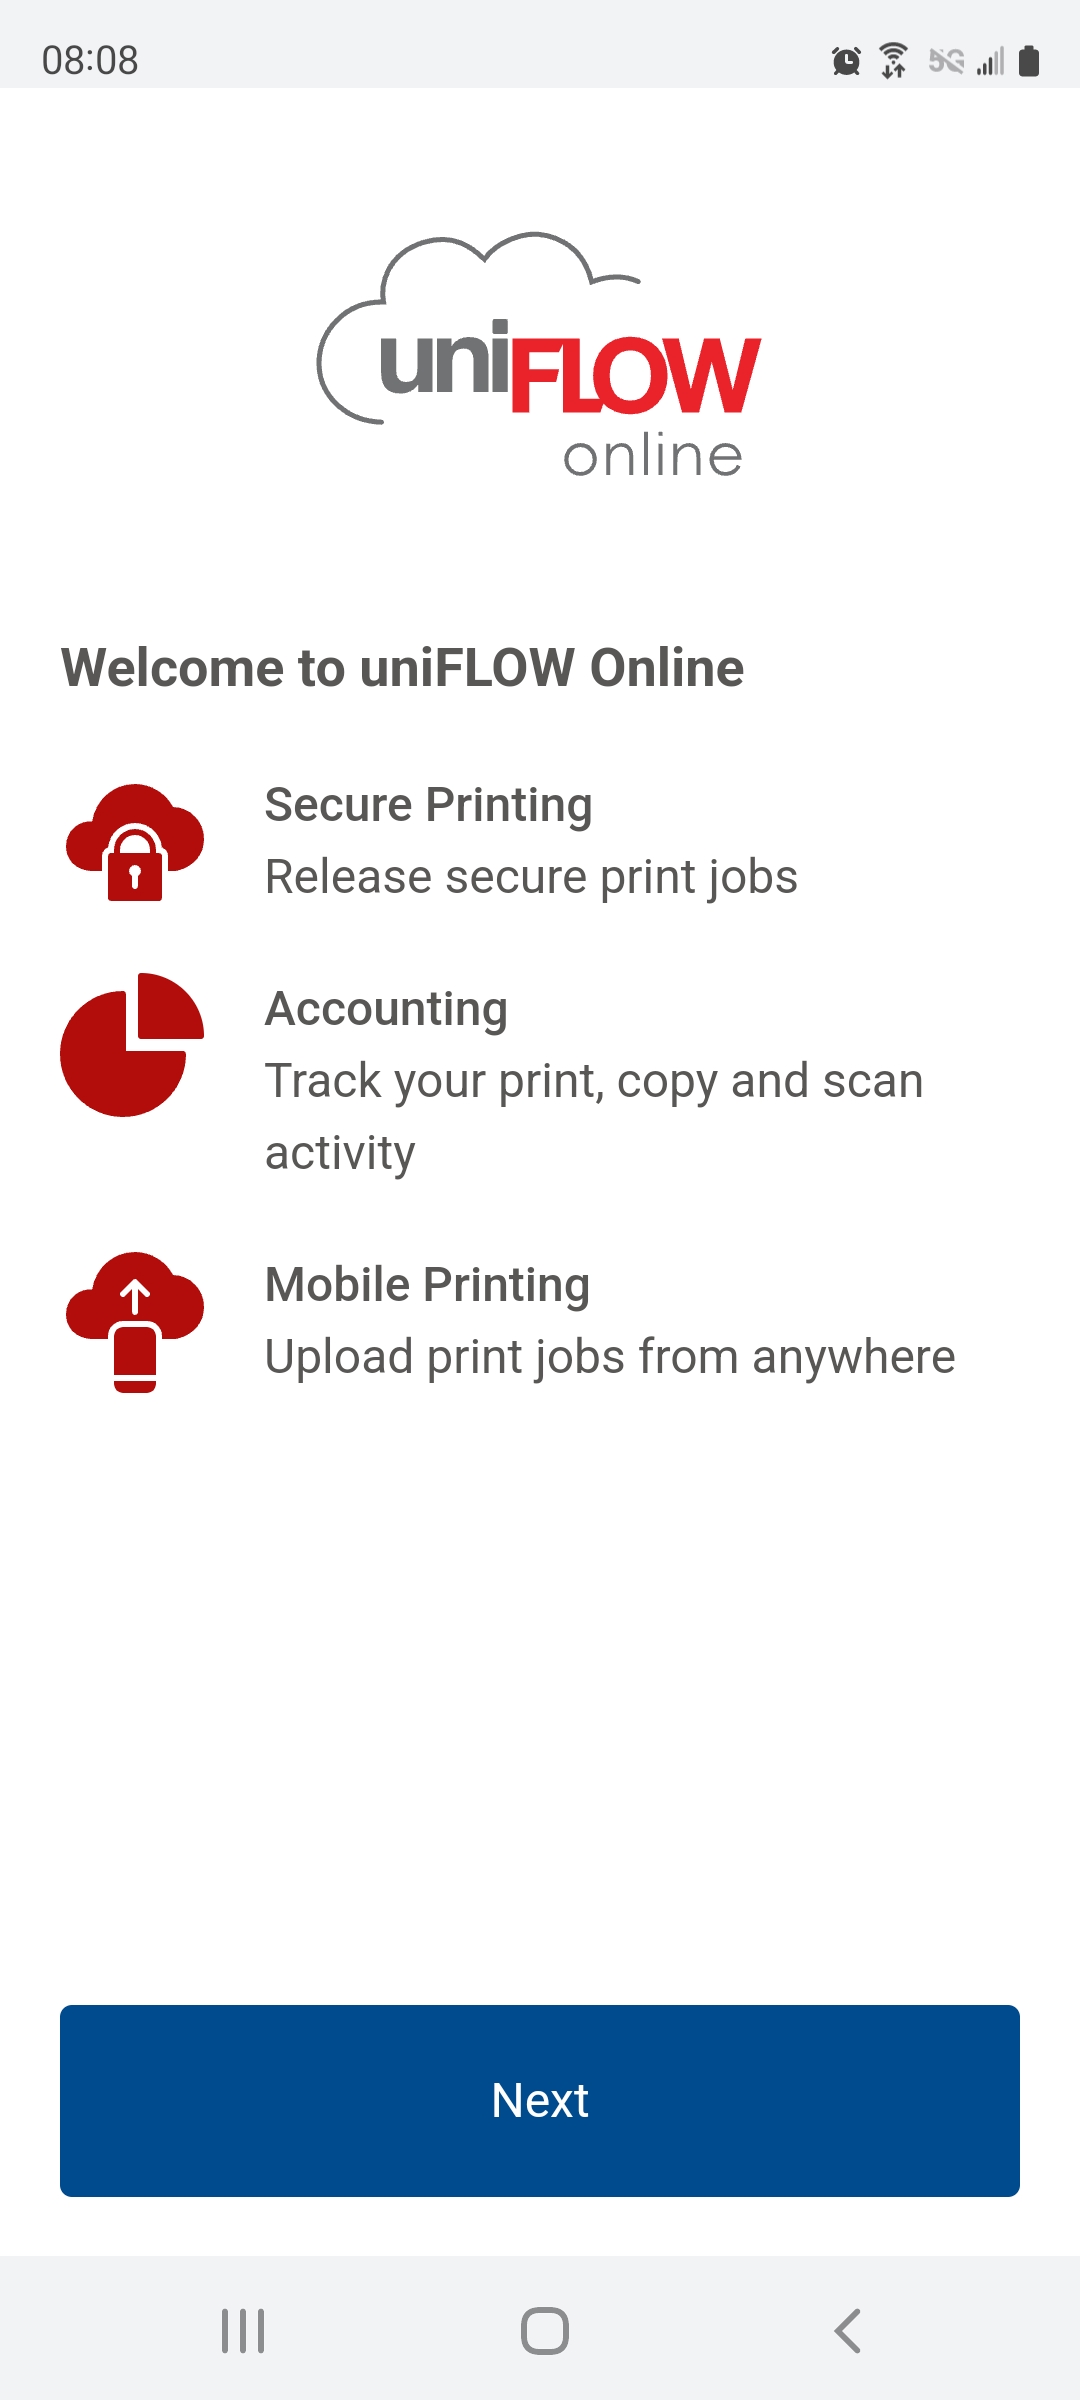
4. For "Login" select Manual login 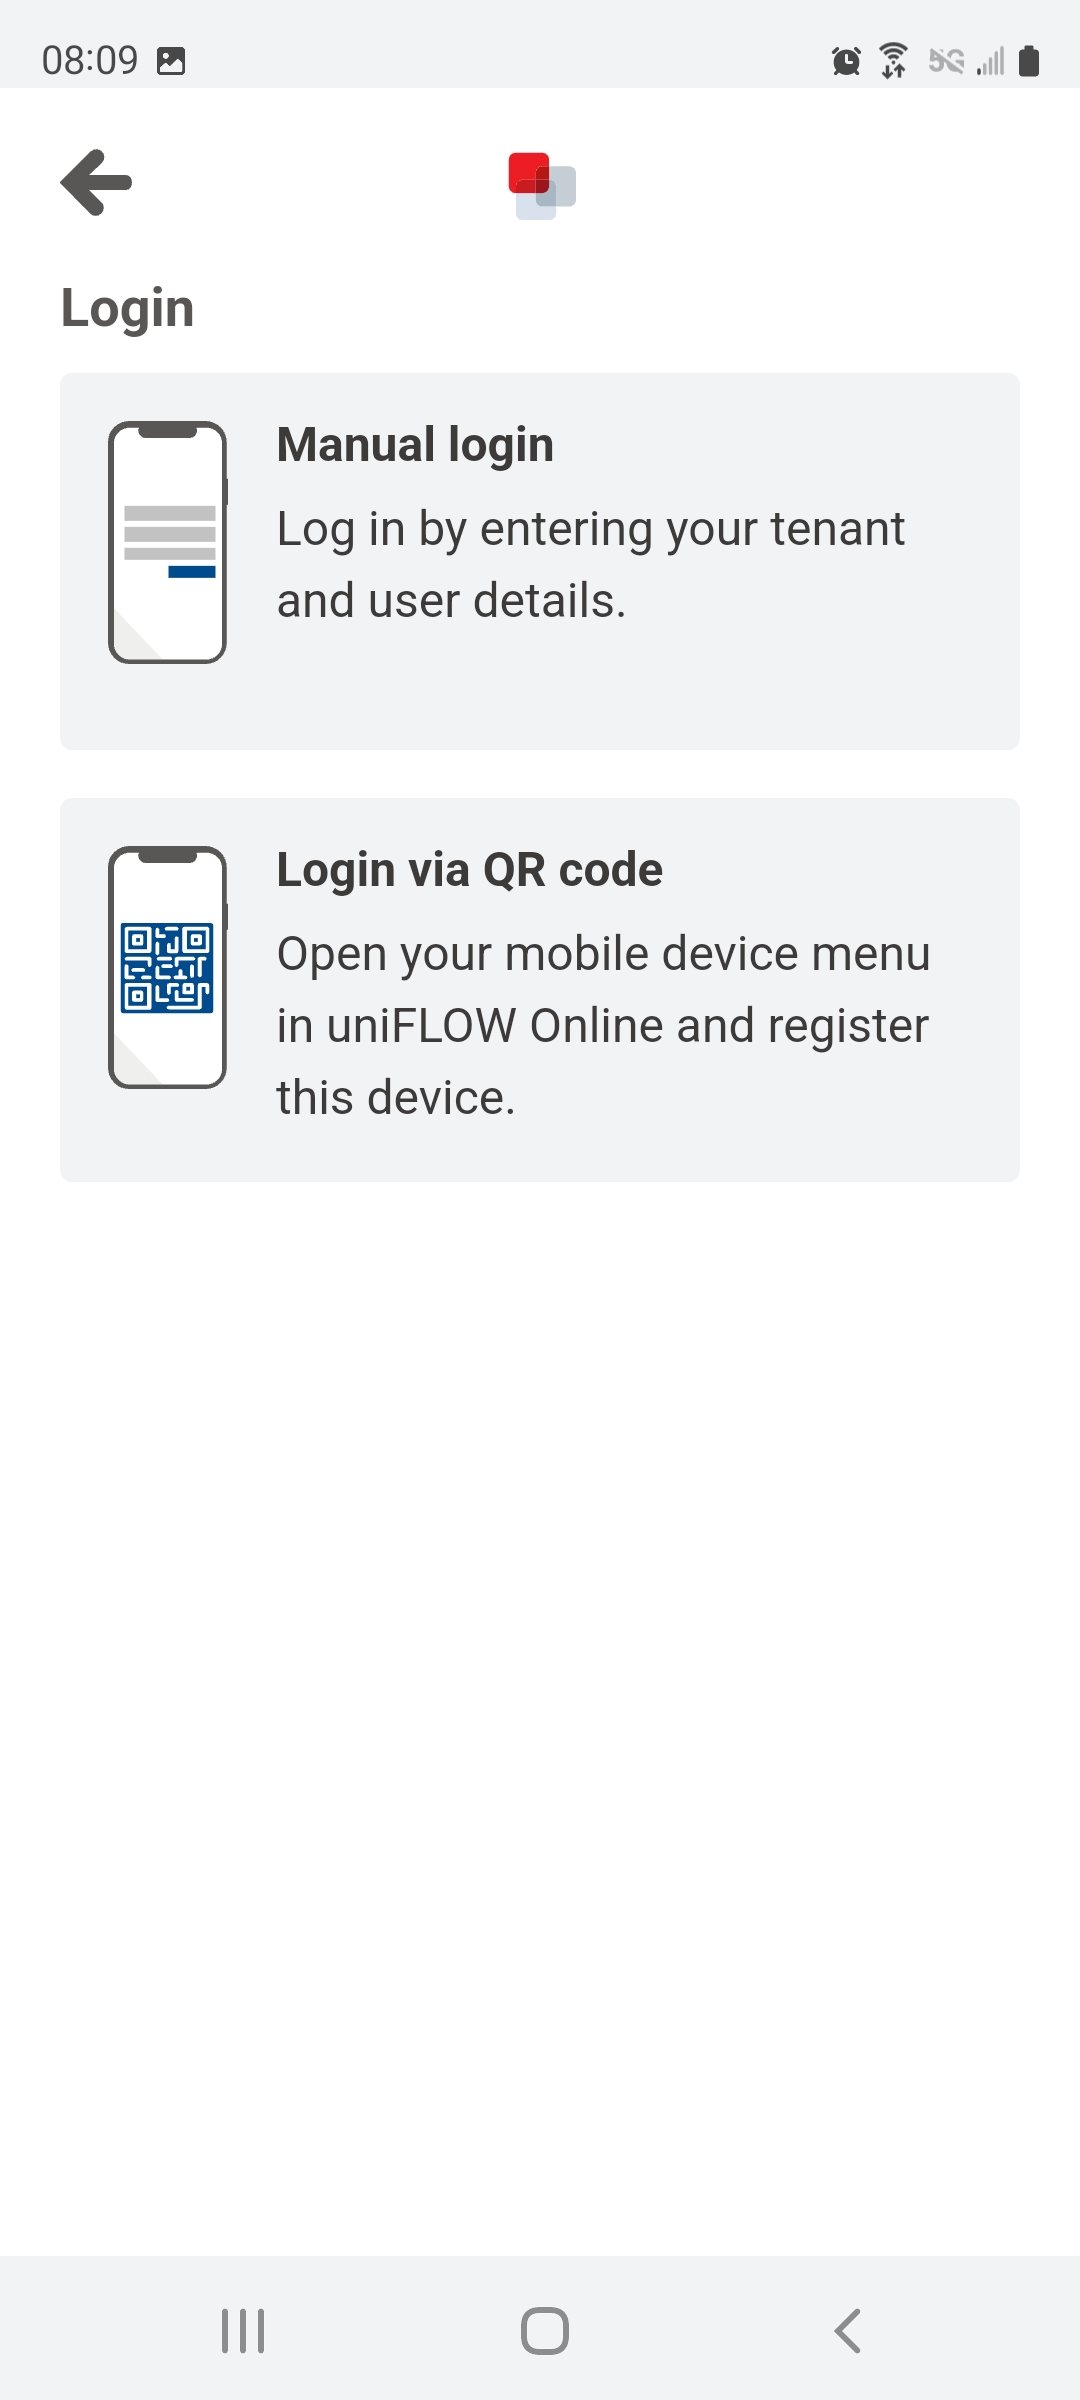
5. For "Enter your tenant URL" enter in "wittenberg.us.uniflowonline.com" and click Next 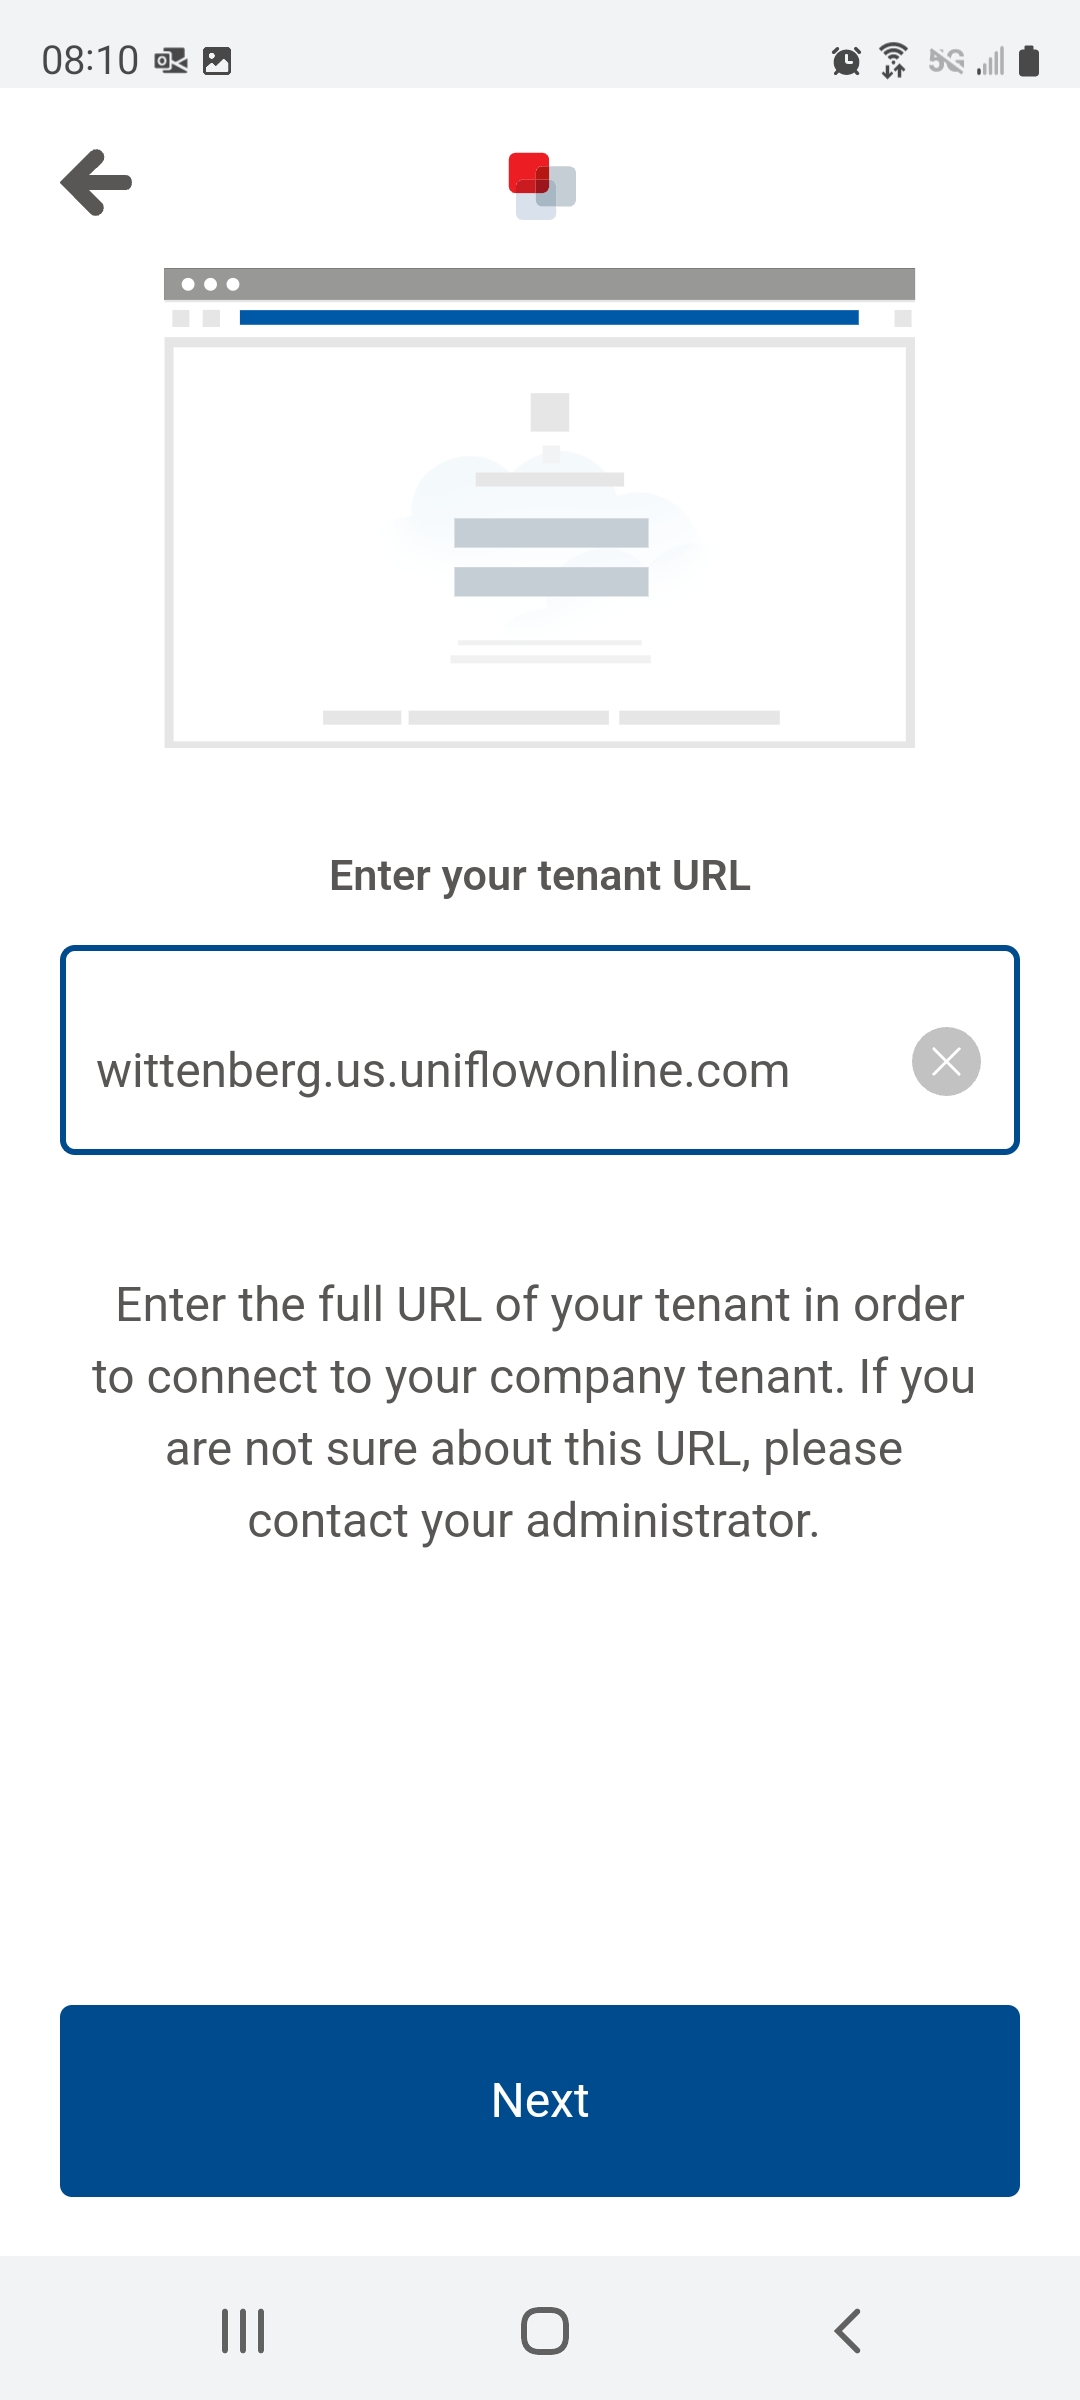
6. When asked to sign into your account, click "AzureAD Authentication" 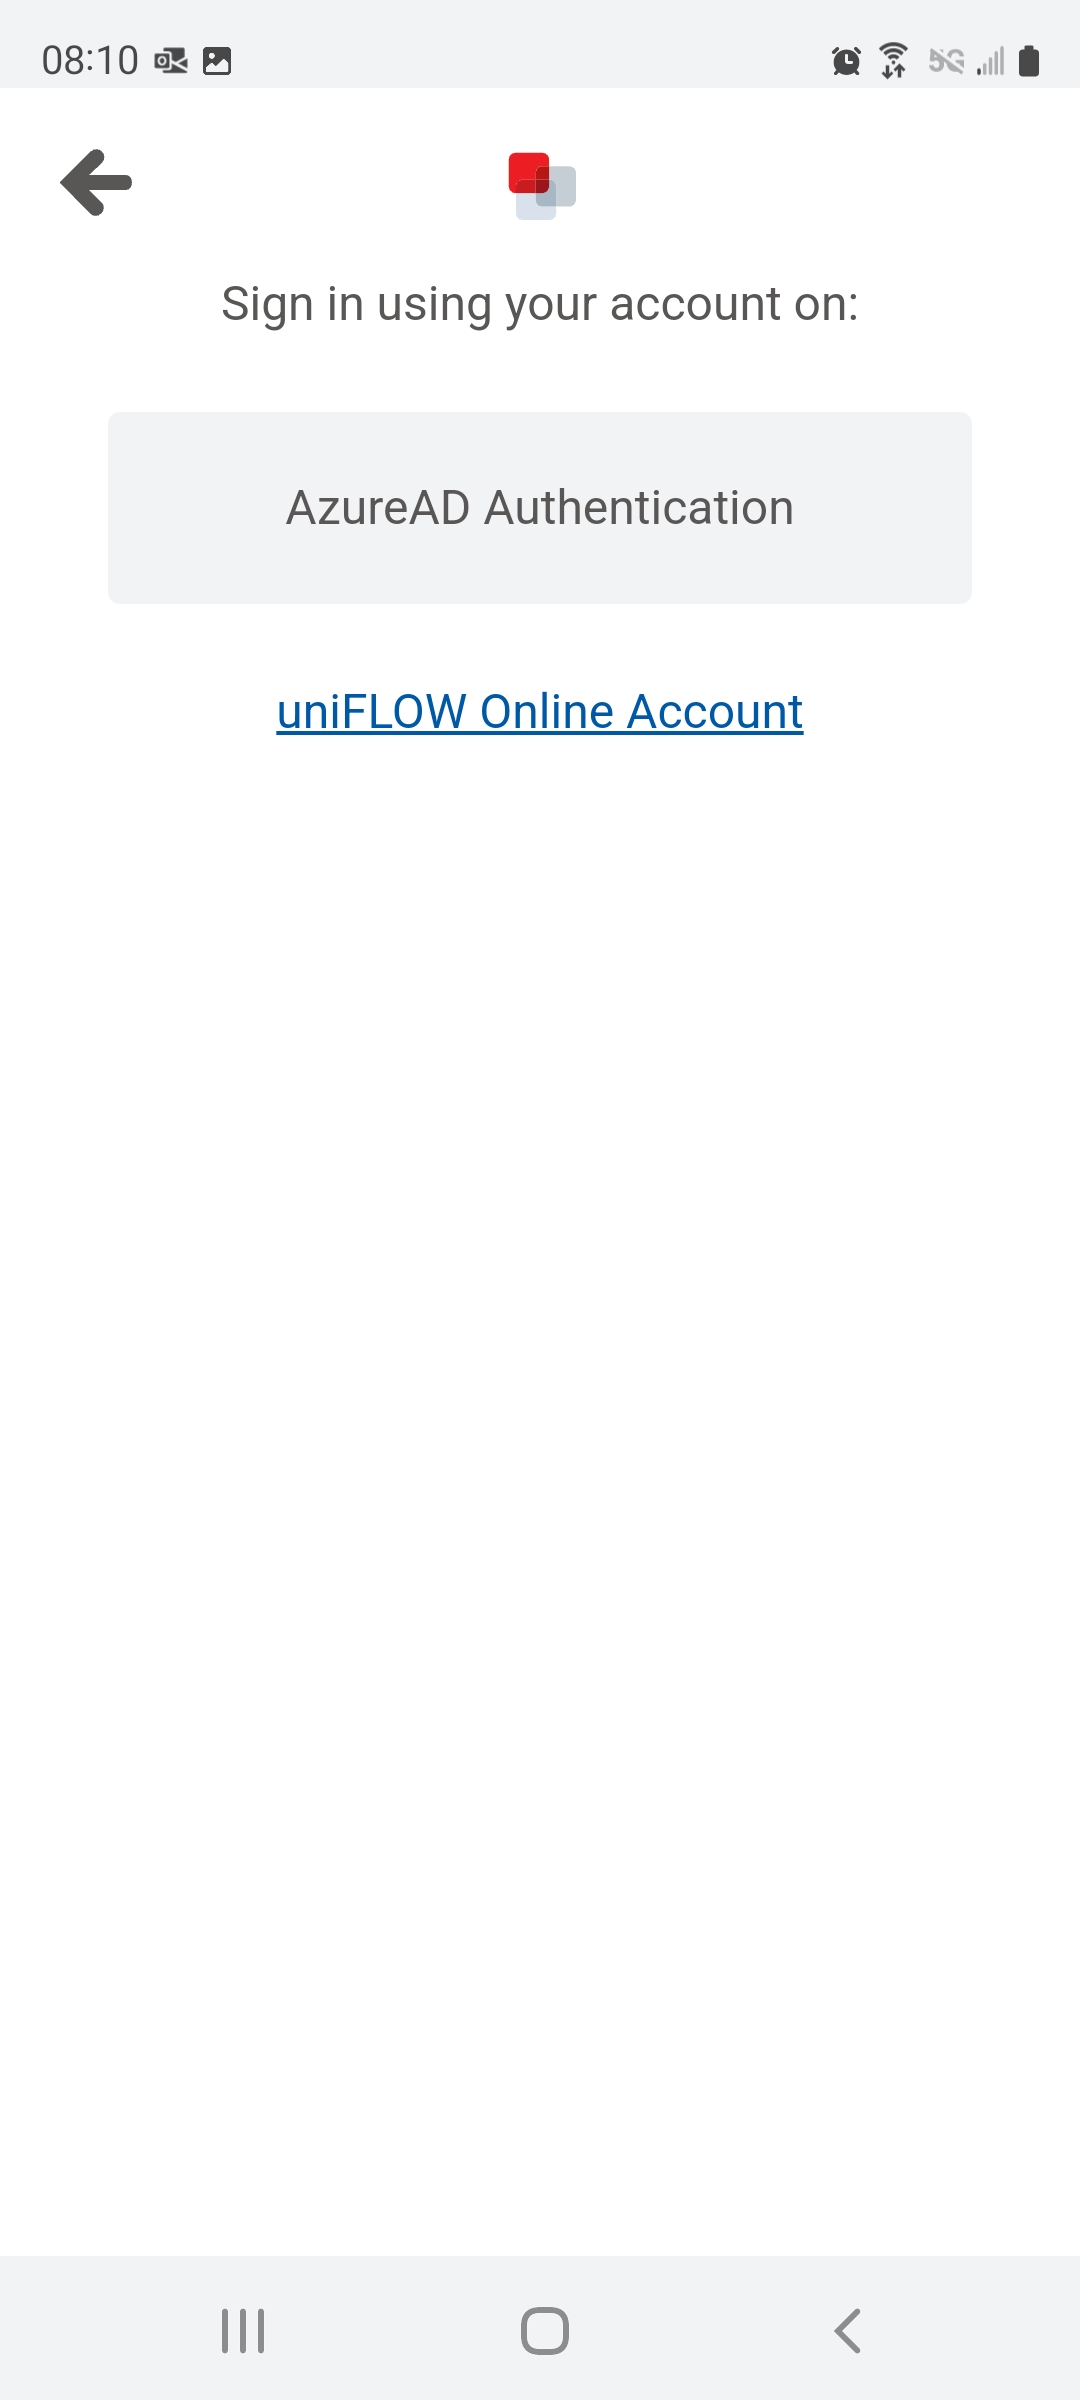
7. Sign in with your campus email address and password, after which you will be taken to the All done! web page
You can close this page and then open the uniFLOW Online app on your phone.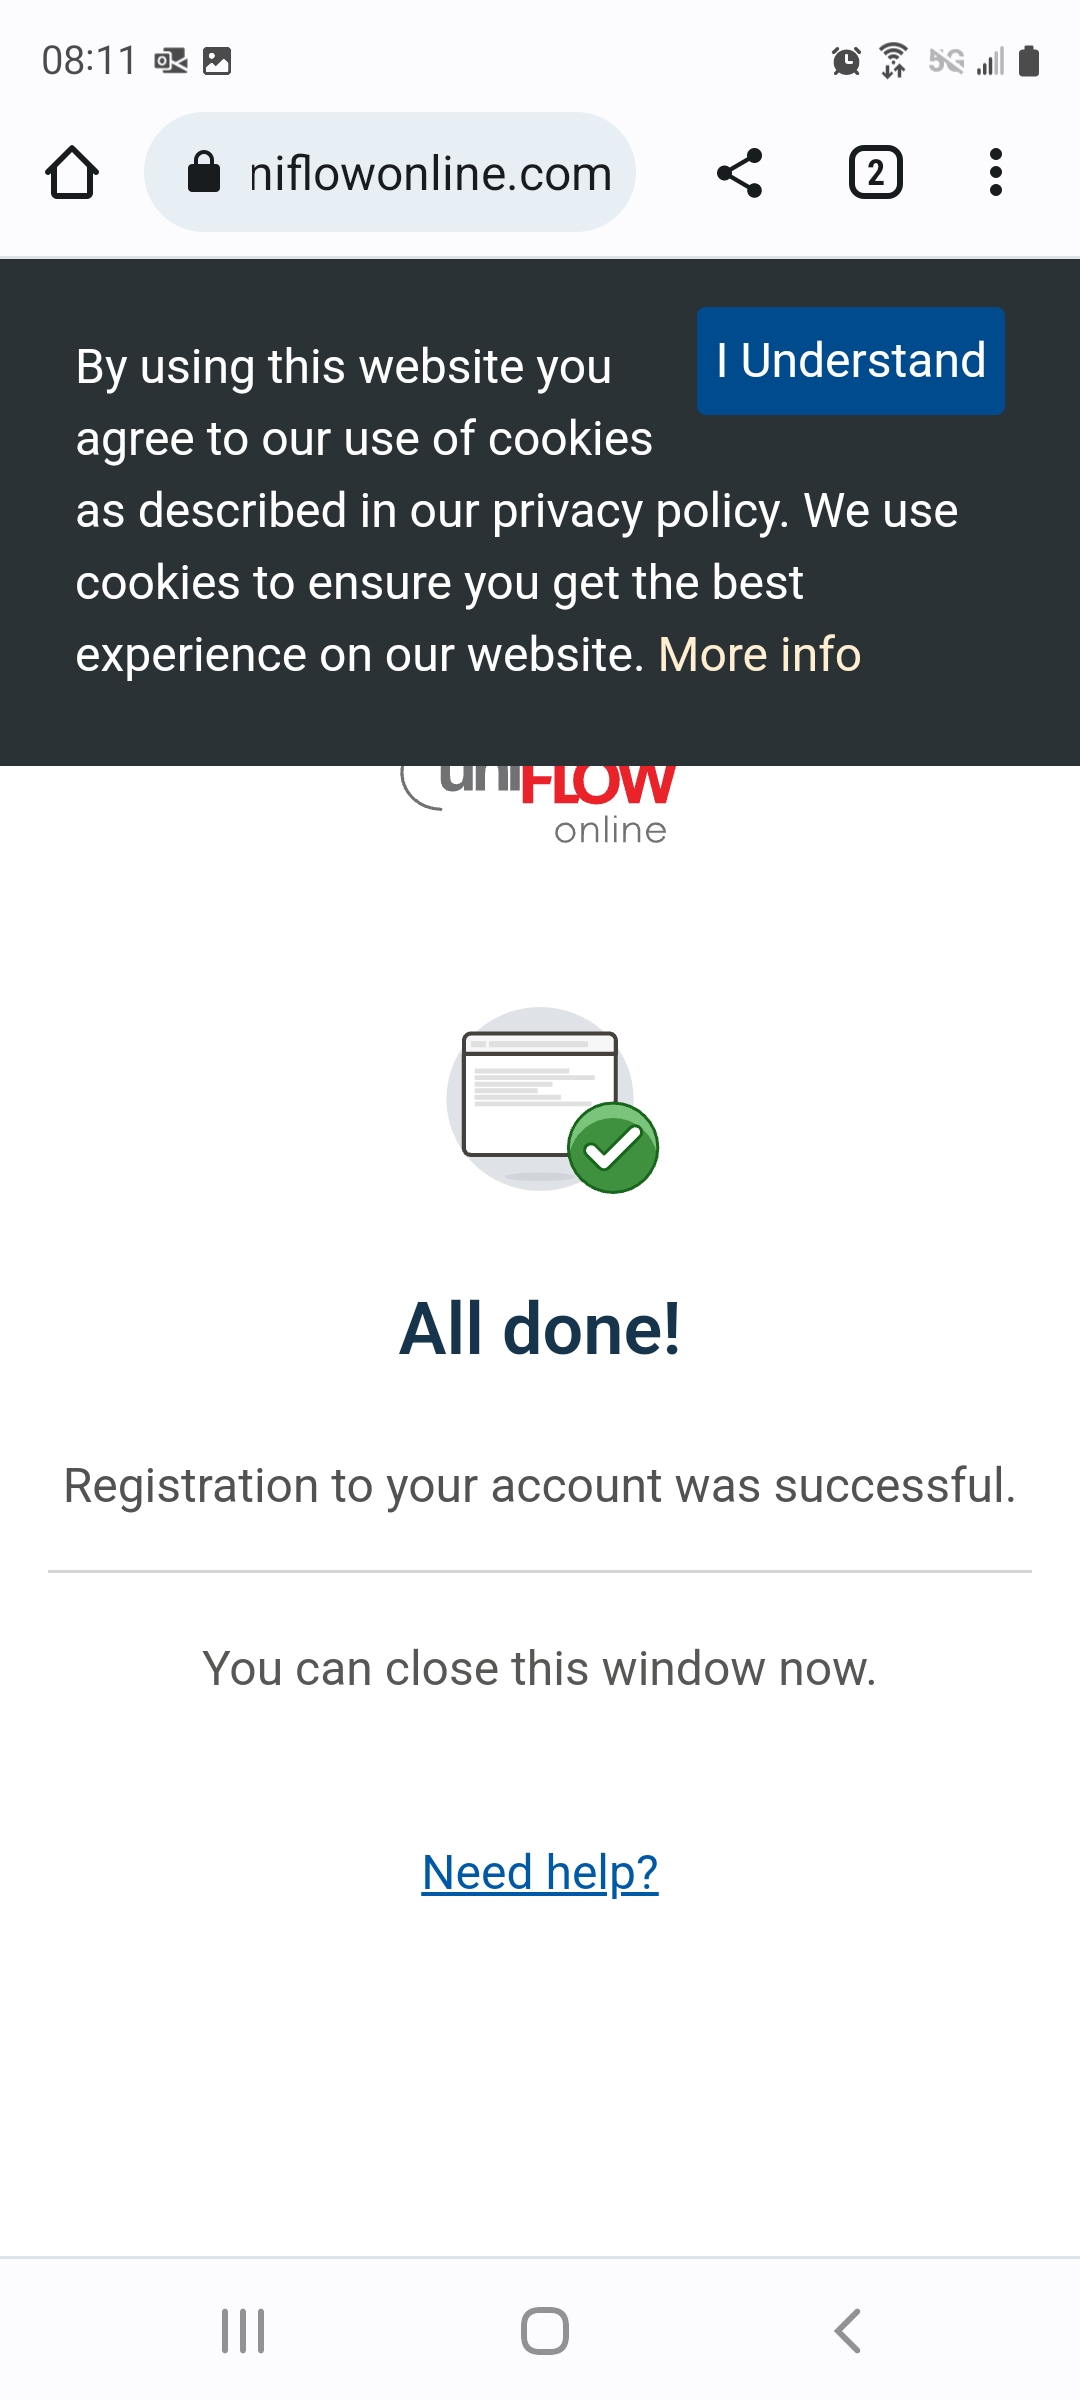
- Installing uniFLOW Online on a Windows personal system
(NOTE: this is not for campus desktops or campus notebooks) This is for personal Windows systems.
Campus desktops and campus notebooks will have the uniFLOW online software installed by ITS- Open a web browser and navigate to https://wittenberg.us.uniflowonline.com
- Click the "Continue with Azure AD Authentication"
- Enter in your campus email address and password when prompted
- You will then be taken to the uniFLOW Online Dashboard
- Select "Start Printing"
- In the "Install printer driver" section click "Download Windows printer driver"
- You may need to click the download option, and select Keep, then select Keep and download, as some browsers may not recognize the download as legitimate
- You may have to allow the download to run as some anti-virus programs may not recognize the download as legitimate either
- Once downloaded run the installer
- Once the installer finishes, you may need to restart your system
- Once the you restart you should see "TigerPrint Online" as an available printer
- Installing uniFLOW Online on a Macintosh system
1. Open a web broser to https://wittenberg.us.uniflowonline.com
2. Click "Continue with AzureAD Authentication"
3. Sign in with your campus email address and password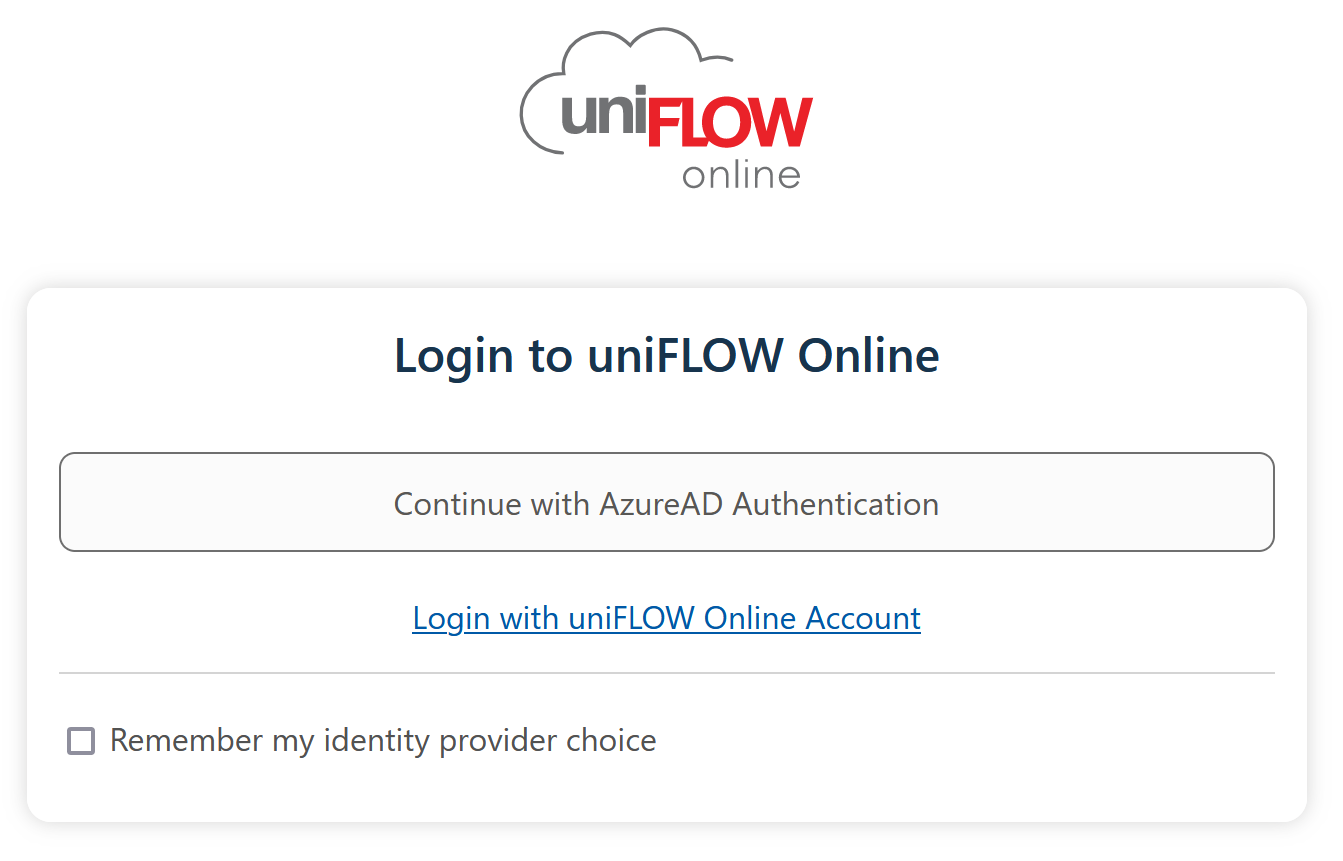
4. From the menu along the left side select "Start Printing" 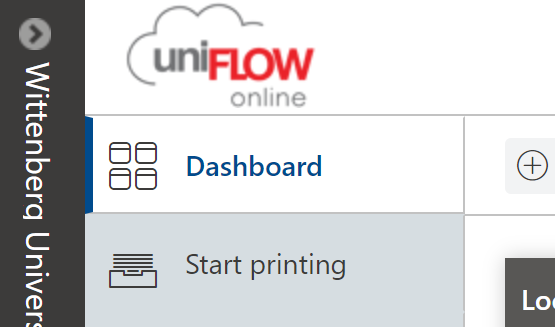
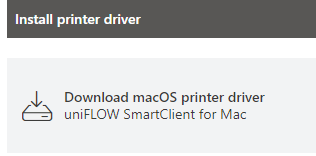
5. Under the "Install printer driver" section select "Download macOS printer driver"
- You may need to click the download option, and select Keep, then select Keep and download, as some browsers may not recognize the download as legitimate
- You may have to allow the download to run as some anti-virus programs may not recognize the download as legitimate either
6. Once downloaded double click the ISO file 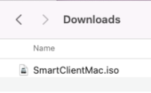
7. Minimize all your open programs
8. Click on the "SmartClientMac" icon on the desktop
9. Click on the installer package 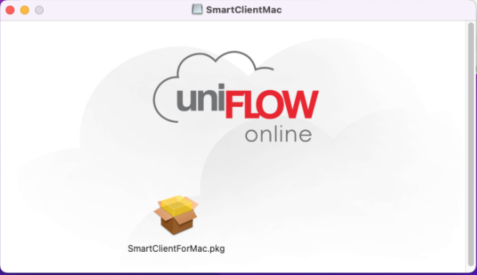
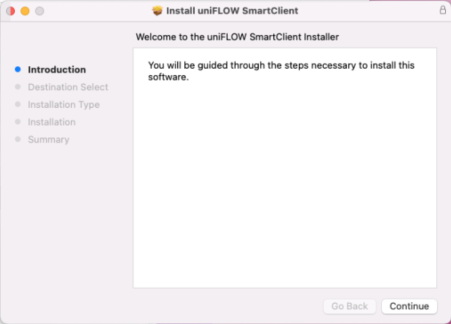
10. Follow the instructions to install the uniFLOW Online Client
- If prompted to trash the package, click Move to Trash
- If prompted to allow the installer access to your desktop click OK
- NOTE: You may need to restart the system once it has finished installing
11. If prompted to sign into the uniFLOW online smart client, click the "Connect with AzureAD Authentication" and enter in your campus email address and password 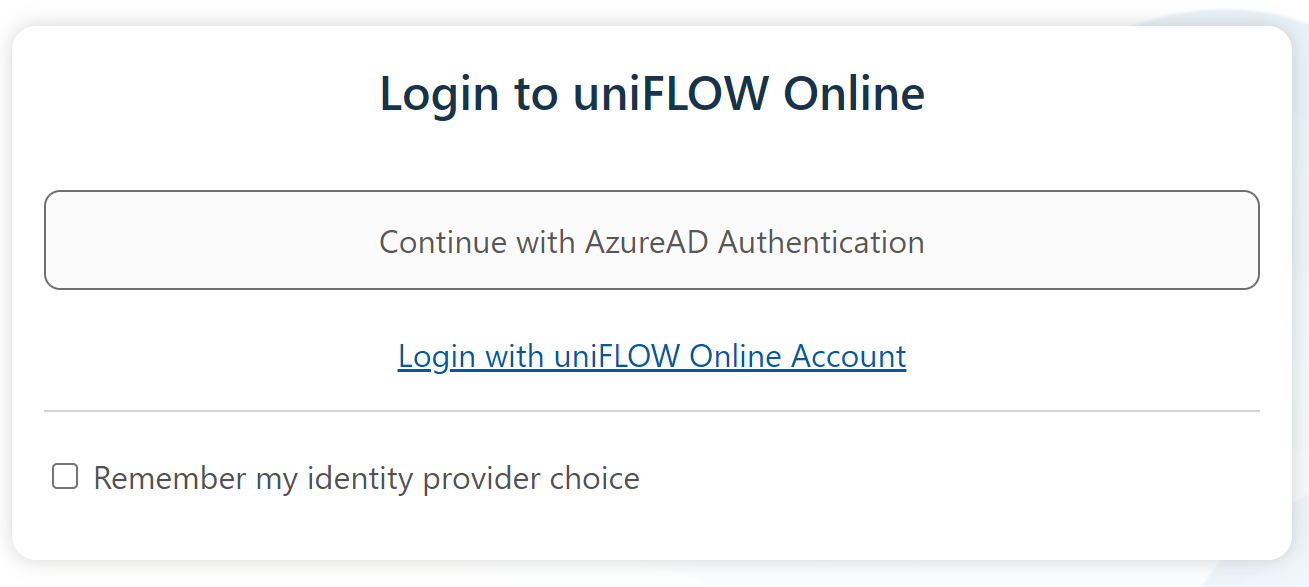
12. Once setup you should see the uniFLOW online smart client in the toolbar 
13. Open System Preferences 
14. Select Printers & Scanners 
15. You should see "TigerPrint Online" listed as a printer option
You are ready to print using the new TigerPrint Online system.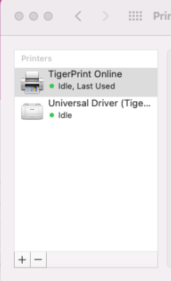
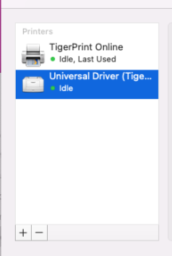
16. If you see "Universal Driver (TigerPrintMac)" listed as a printer option. You will want to remove that option as that is the old tigerprint option.
17. Highlight the "Universal Driver (TigerPrintMac)" option and click the minus sign at the bottom of the list to remove it- NOTE: you may have to click on the Lock icon to unlock the settings to allow you to remove the printer
- Setting up the uniFLOW Online Chrome extension
- Open a web browser and navigate to https://wittenberg.us.uniflowonline.com
- Click the "Continue with Azure AD Authentication"
- Enter in your campus email address and password when prompted
- You will then be taken to the uniFLOW Online Dashboard
- Select "Start Printing"
- Select the option for the Chrome extension
- When prompted for the tenant, enter in "wittenberg.us.uniflowonline.com"
- If asked, select AzureAD Authentication, and sign in with your campus email address and credentials.
- Setting up Connections for Scan To, Print From, and Email options
UniFLOW Online allows for some nice new features such as the following:
- Scan to your Campus OneDrive or Microsoft Teams
- Scan to your own campus email or to another campus email account
- Print a document directly from your Campus OneDrive or Microsoft Teams Site
Just follow the instructions below to easily set up these options for your account
- Open a web browser and navigate to https://wittenberg.us.uniflowonline.com
- Click the "Continue with Azure AD Authentication"
- From the list of Notifications you should see a few options labeled "Connect with ..."
- Just click on the "Connect" link under the "Connect with ..."
- When prompted click the "Authorize" button
- Enter in your campus email address and password when prompted
- Click Close once it says it has been authorized
- You now have the option to access OneDrive, Teams, and Email through your email account at the MFDs
Printing
- How much does it cost to print something?
At the beginning of each Fall and Spring Semester students are allocated $200 in funds at the start of each semester. This equates to 2,000 Black and White single sided pages a semester. Here is a breakdown of the costs.
Printing costs
- Black & White Single Sided 10¢ per page
- Black & White Double-Sided* 15¢ per double-sided page
- Color Single Sided** 25¢ per page
- Color Double Sided** 45¢ per double-sided page
NOTES:
* Most MFDs are set to this by default (B&W only, double-sided)
** Not all MFDs are color, if you release a color print job on a Black and White MFD it will only charge you for Black and White.These costs are for all printers around campus; both Multi-Function Printers (MFDs) and non-MFDs.
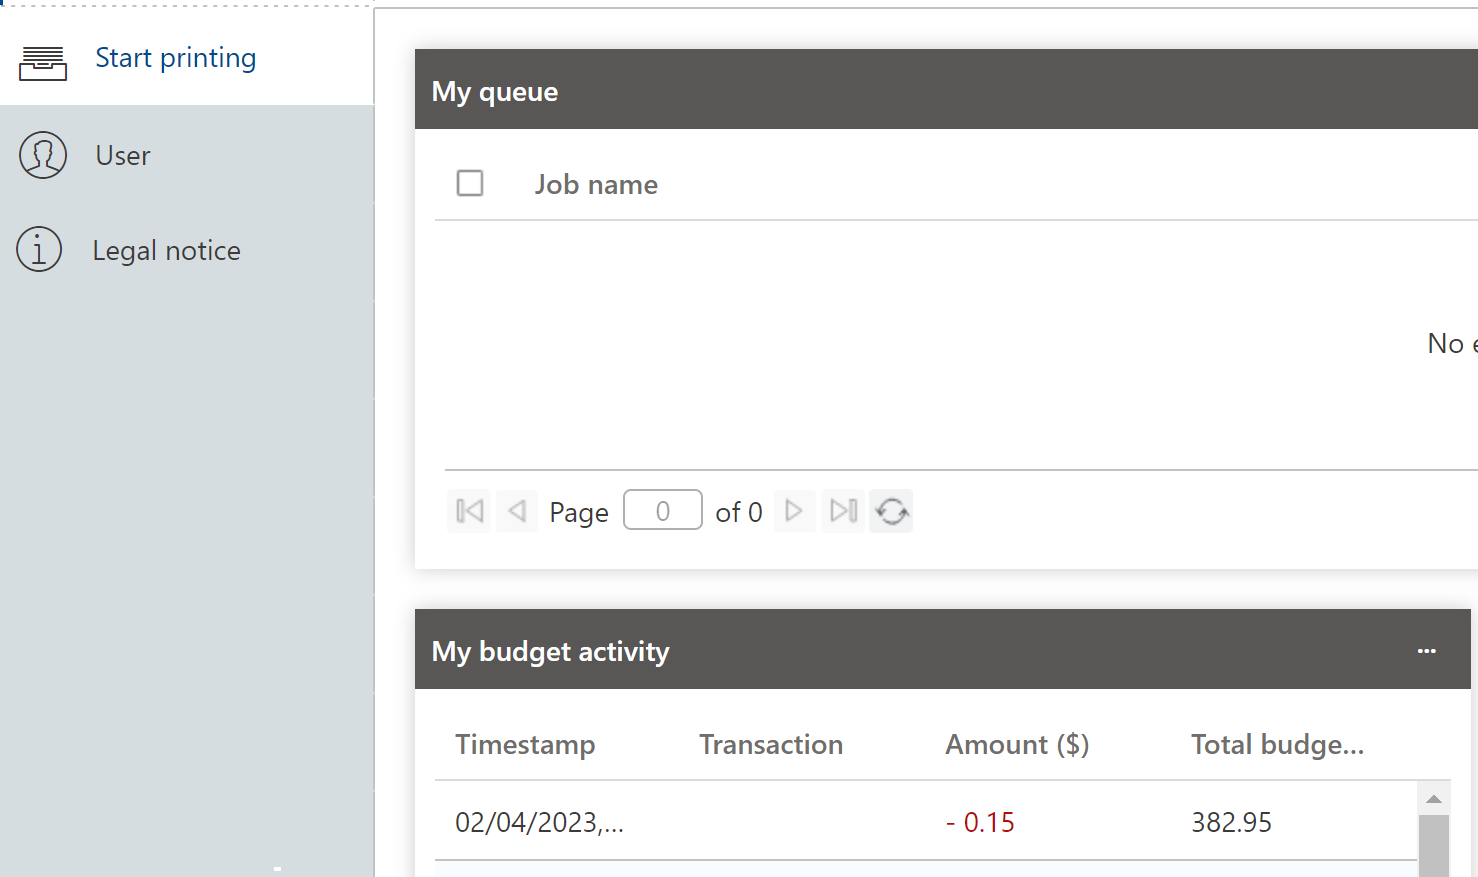
- How do I check my quota?
When you sign in to an MFD, and click "Secure Print" your current budget will be listed near the top left of the panel. 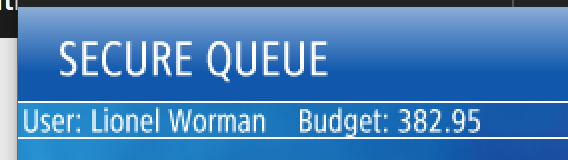
-OR- - Sign into https://wittenberg.us.uniflowonline.com.
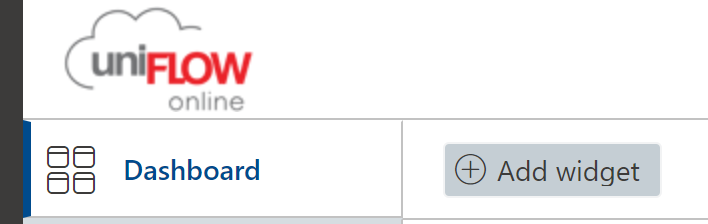
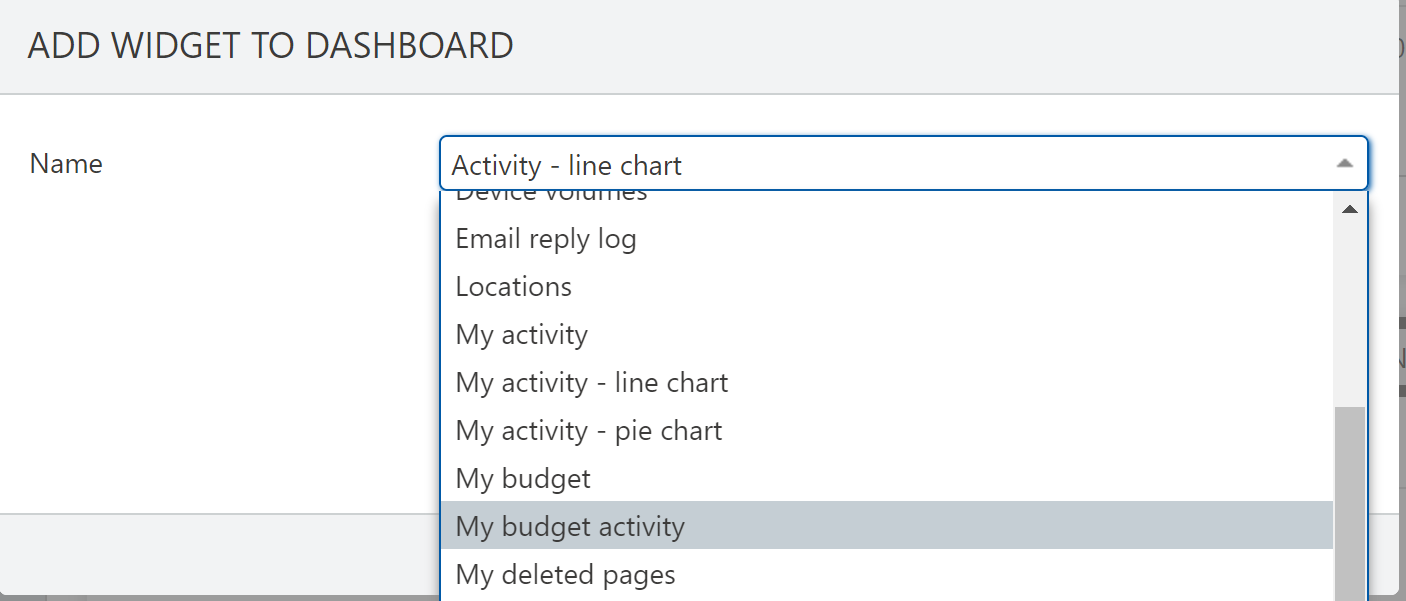
- Under the heading "My Budget Activity" you should see "Total Budget ($)"
- If you do not see "My Budget Activity" click the "+ Add Widget" button
- Then select "My Budget Activity" from the list
- Where are the Multi-Function Devices (MFDs) on campus?
Available to Campus
- Chakeres Theater
- Kreig 2nd floor
- Science Building outside room 370
- Shouvlin 2nd floor
- Student Center Gus Geil Lounge
- Thomas Library Reference Lab
- Hollenbeck 115
- Hollenbeck 2nd Floor
- Hollenbeck 321 (8am-5pm during week)
- Recitation Hall Second Floor
- Recitation Hall Third Floor
- Science Building 222 (8am-5pm during week)
- Science Building 246
- Science Building in hallway outside 329
- Shouvlin 1st floor
- Student Center near Student Activities office
- Thomas Library Lobby
Restricted to Faculty and Staff
- Advancement 2nd
- Hollenbeck 103
- Hollenbeck 221
- Physical Plant
- Recitation Hall 05
- Recitation Hall 21
- Recitation Hall 40
- Recitation Hall 53
- Thomas Library Offices
- Advancement 3rd floor
- Blair Hall 222
- Hagen Center
- HWA 309
- Koch 107
- Recitation Annex 50
- Student Services
- Weaver Chapel
- Printing from a Windows system
In the past when you printed from a windows system, you would select one of the several printer options available to print to. TigerPrint was always an option, and that is what you printed to when you wanted to get your print out at a MFD. With the new uniFLOW online service this changes.
1. When presented with the list of printers select "TigerPrint Online"
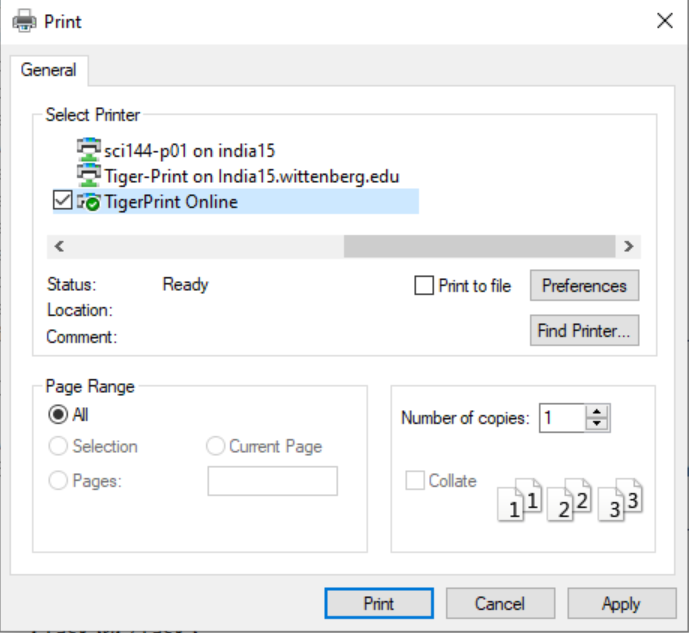
2. Then select the "Secure Online" option
Your print job will now be available at any of the MFDs to be released
Or you can select the printer that is the lab, and it will print out at that printer
NOTE: This window will only appear if you are in a location that has a local network, non mfd, printer available. If there is not a local network printer, it will defaut to secure print, and not display this window.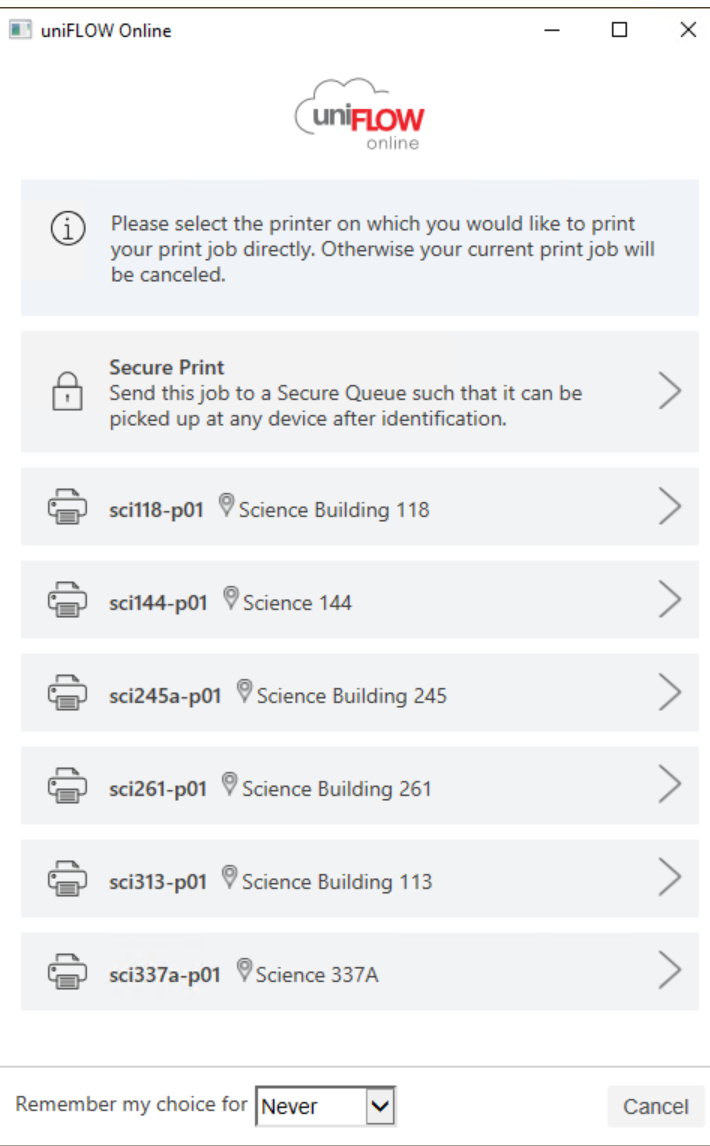
- Printing from a Macintosh system
1. When presented with the list of printers select "TigerPrint Online"
The other options, such as TigerPrint on india15, will eventually not be present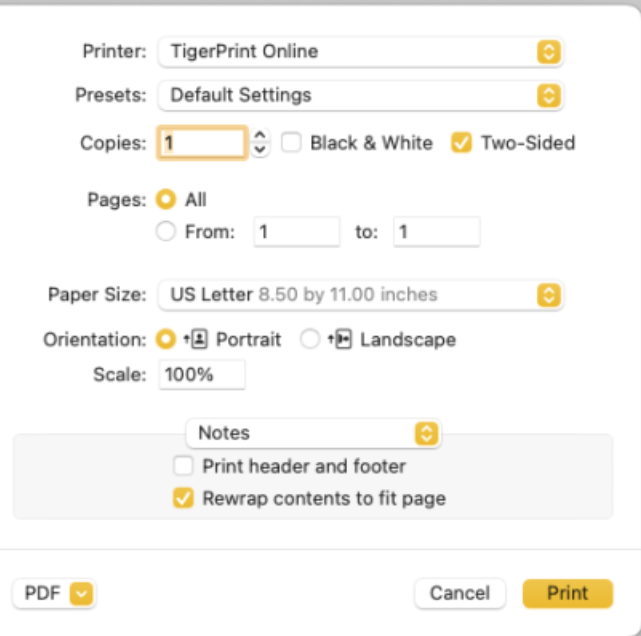
2. If prompted to select a location, select the appropriate option
Note: You may not be prompted for setting your location.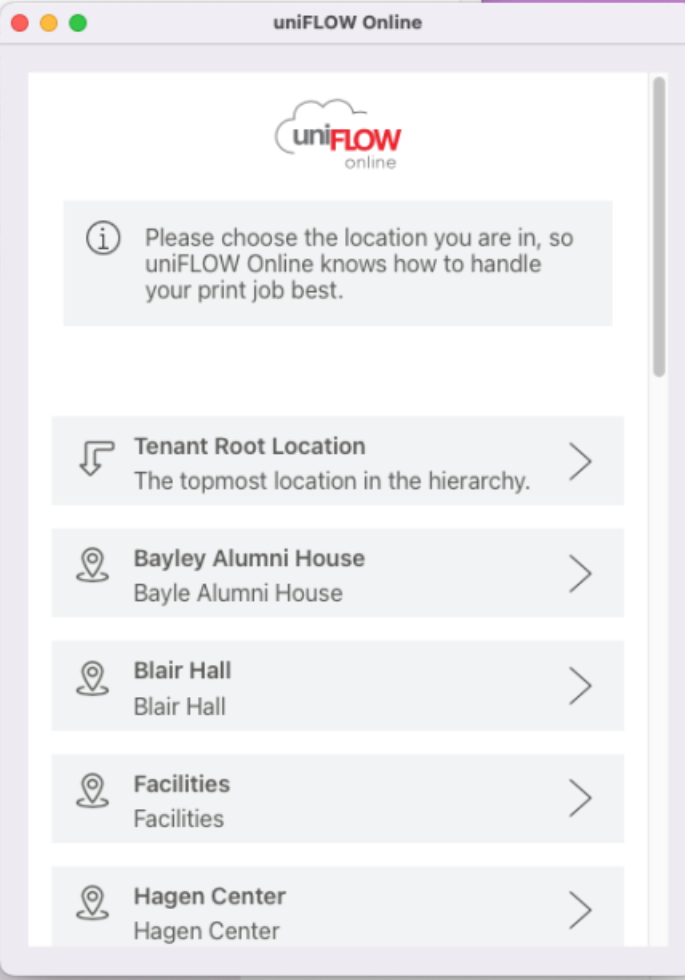
3. If prompted to select a printer, select the "Secure Online" option
Your print job will now be available at any of the MFDs to be released.
NOTE: This window will only appear if you are in a location that has a local network, non mfd, printer available. If there is not a local network printer, it will defaut to secure print, and not display this window.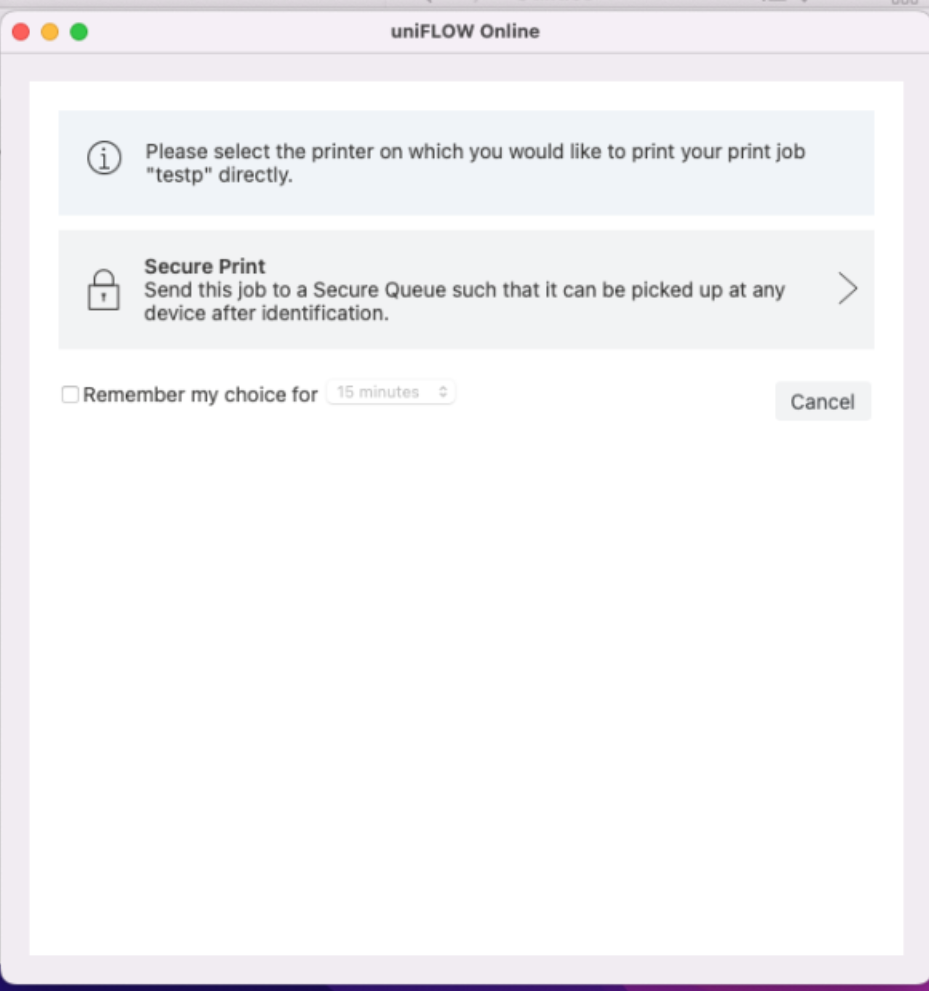
- Releasing Print jobs at the MFDs with your Campus ID
This has not changed from the previous version. Just some things to be aware of:
- This option is for MFDs that have the Mag stripe reader on them
- Make sure the mag stripe on your ID is facing away from the light on the reader
- If it does not work right away, try swiping it at a slower or faster speed. The light will turn red if it does not read it correctly. But it will beep three times if it reads it correctly.
- Releasing Print jobs at the MFDs with the Mobile App
- First make sure you have the "uniFLOW Online Print & Scan" app installed on your mobile device, and you are signed into it
- In the mobile device select the "My Queue" option. It should be at the bottom right in the app
- Select the print job you want to release, by clicking on it
- When the QR window appears, point it at the QR Code on the MFD or printer
- Your print job should then print out at the MFD or printer
- Printing from the Mobile App
1. Open the mobile app on your phone 
2. Select the Print option from the options across the bottom of the app 
3. Select either "File upload" to upload a file from your mobile device
or select "Take a picture" to take a picture and send that to the print queue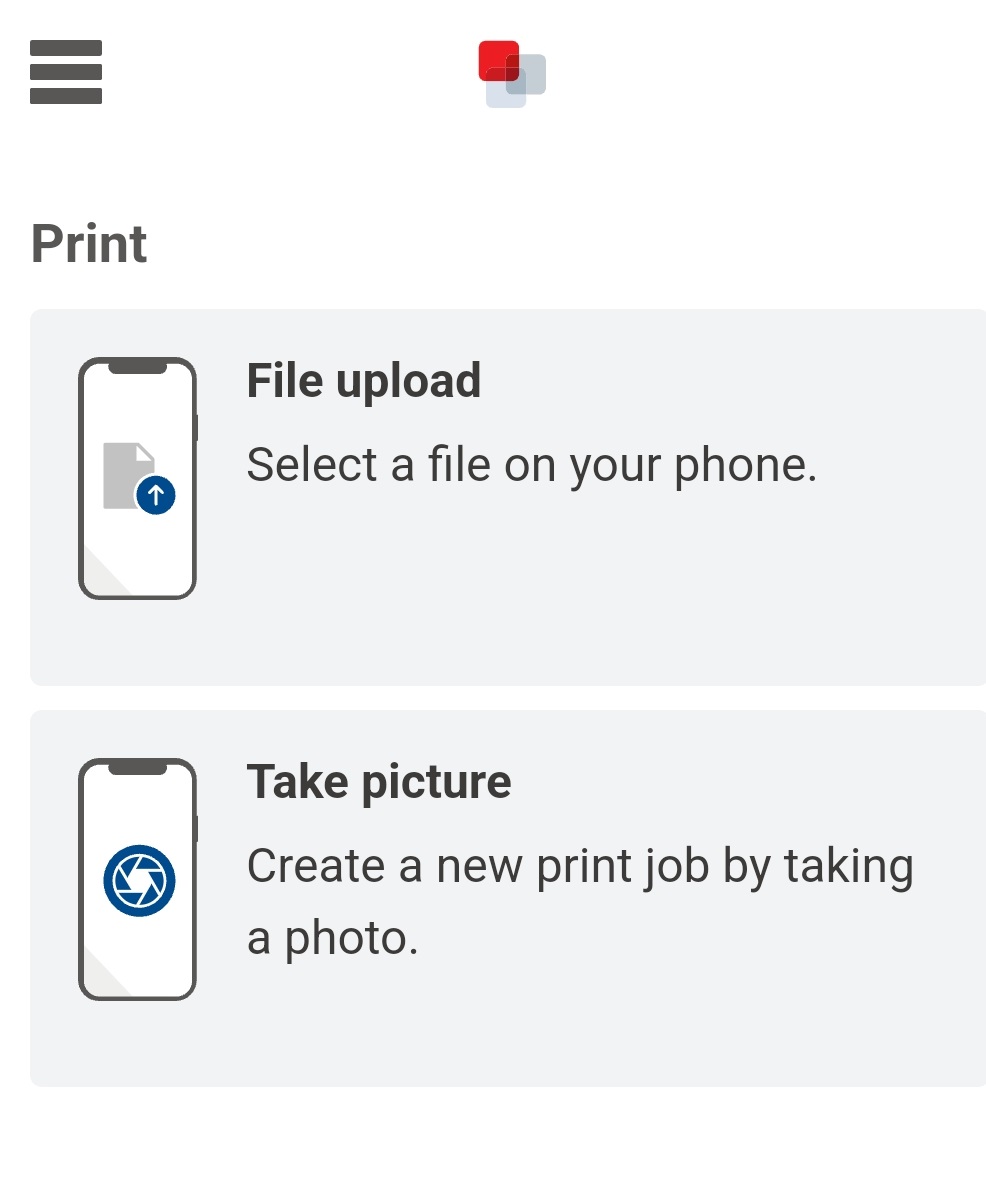
- Uploading a document via the uniFLOW online Web Page
1. Open a web broser to https://wittenberg.us.uniflowonline.com
2. Click "Continue with AzureAD Authentication"
3. Sign in with your campus email address and password4. From the menu along the left side select "Start Printing" 5. You should see a box labeled "Send file via drag and drop"
6. Either drag and drop your file into this box, or click the 'Browse' link to browse for the file you want to print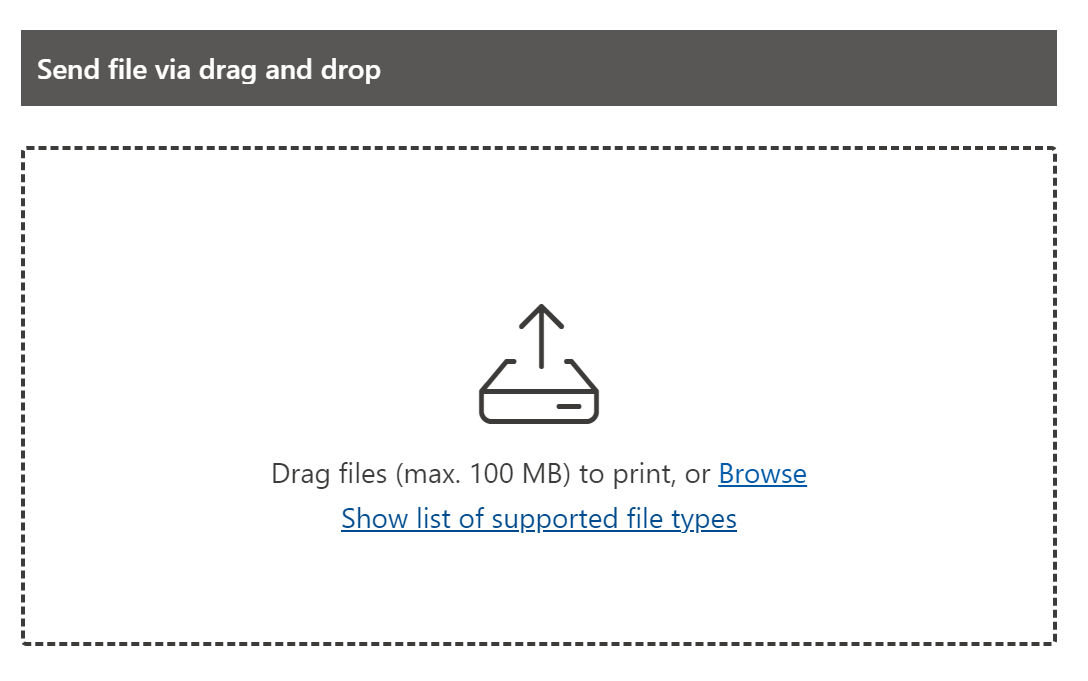
last reviewed 2026-02-09