Microsoft Stream on Sharepoint is a Video Hosting service within the Wittenberg University Office 365 service. In Spring 2023 this service changed from its own specific service to a new Stream On Sharepoint service. The biggest difference is that videos are now hosted on users' Campus OneDrive folders, or in a team site, instead of a different dedicated hosting service.
- Policy and Guidelines for Sharing Videos
Policies- Policies and Terms of Use for Technology at Wittenberg University
- Faculty Manual, Staff Manual, and/or Student Handbook
- FERPA Guidelines for Class Session Recordings: Recordings made of class sessions can only be made available to the faculty teaching that specific class and those enrolled in that class only!
- Wittenberg University reserves the right to restrict or remove content at its discretion.
Guidelines Do These:- Consider your audience: global, professional, time-constrained, and future viewers as well as now
- Post short videos: Respect the time the viewers are giving to your video and try not to waste it
- Protect your brand: nothing is anonymous so be aware of what the content will say about you
- Keep private content private: If it does not need to be seen by everyone, restrict it to only those who should see it
- FERPA Guidelines for Class Session Recordings: For recordings of class session they must be only visible to the faculty teaching the course and the students enrolled in that specific course
- Abide by the policies: See the above policies
- Ask if you have any questions: Please ask the Solution Center if you have any questions or concerns
Avoid These:
- Violating Copyright: If you or Wittenberg University do not own the rights, don't post the content, period.
- Solicitations
- Profanity or obscene content
- Oversharing: Microsoft Streams is not a personal service, Wittenberg University owns the content.
- Best Practice for Setting up a Course Team Site Classwork Module for sharing of videos.
This is by no means the only method, but this is the best practice. 1. Sign into https://portal.office.com and then click the Apps icon on the left side of the screen. 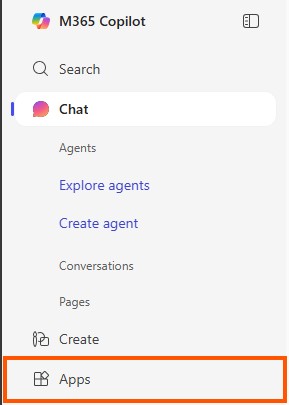
2. Click the Teams icon to open Teams in the browser. 
3. Select Teams on the left menu. 
4. Select the Team for the Course you are wanting to add content to. 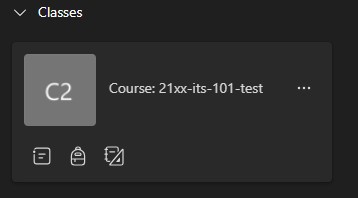
5. Select Classwork. 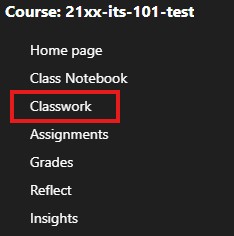
6. Click Add Module then New Module. 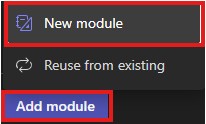
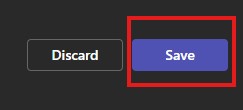
7. Name the Module "Course Materials" and click save. 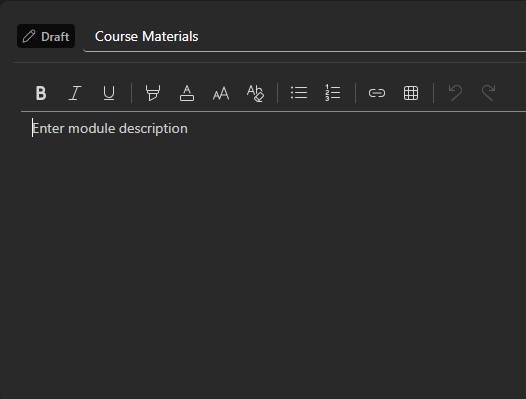
8. Click the + button near publish. Click file and then choose between Upload from this device and Cloud files. 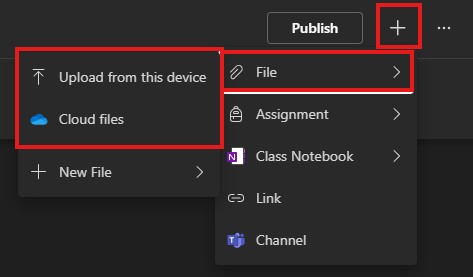
9. Cloud files will open this menu. Find the file, select it, and then click the blue select button in the top right corner.
If you select Upload from this device, it will open up file explorer for you to find and "Open" the file.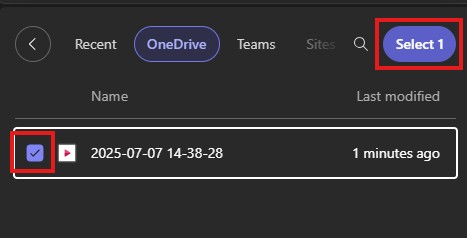
10. Once the file has finished uploading and you are finished with adding files, click the Publish button. A prompt will appear. Select Publish again. 
At this point anyone on the Course Team site will have access to view the contents of the Classwork Tab. In later instructions we will show how to share the Course Material Module for such things as Moodle. - Sharing a link to the Course Materials Module to Individuals or Moodle.
You will use the copied link to the Course Materials Module to send an individual a link to the content. For Moodle, you will need to add a URL Resource to the course and paste the copied URL into the "External URL" field.
1. Sign into https://portal.office.com and then click the Apps icon on the left side of the screen. 2. Click the Teams icon to open Teams in the browser. 3. Select Teams on the left menu. 4. Select the Team for the Course you are wanting to add content to. 5. Select Classwork. 6. Hover over the Course Materials Module. Click the ellipses followed by copy link to module. 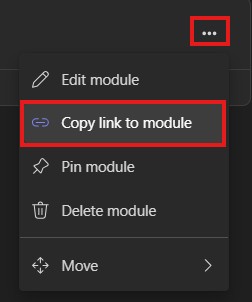
You would then use the copied URL to send a link to the Course Materials Module.
For Moodle you would add a URL Resource to the course, and paste the copied URL into the "External URL" field.
NOTE: Only users with access to the Course Team Site will be able to access the content from this link.